quilted yoga mat tote bag
Every now and then you just gotta make something fun... or maybe something useful. Here's a quilted yoga mat tote bag I made from a couple of batik fat quarters and a yard of purple batik.

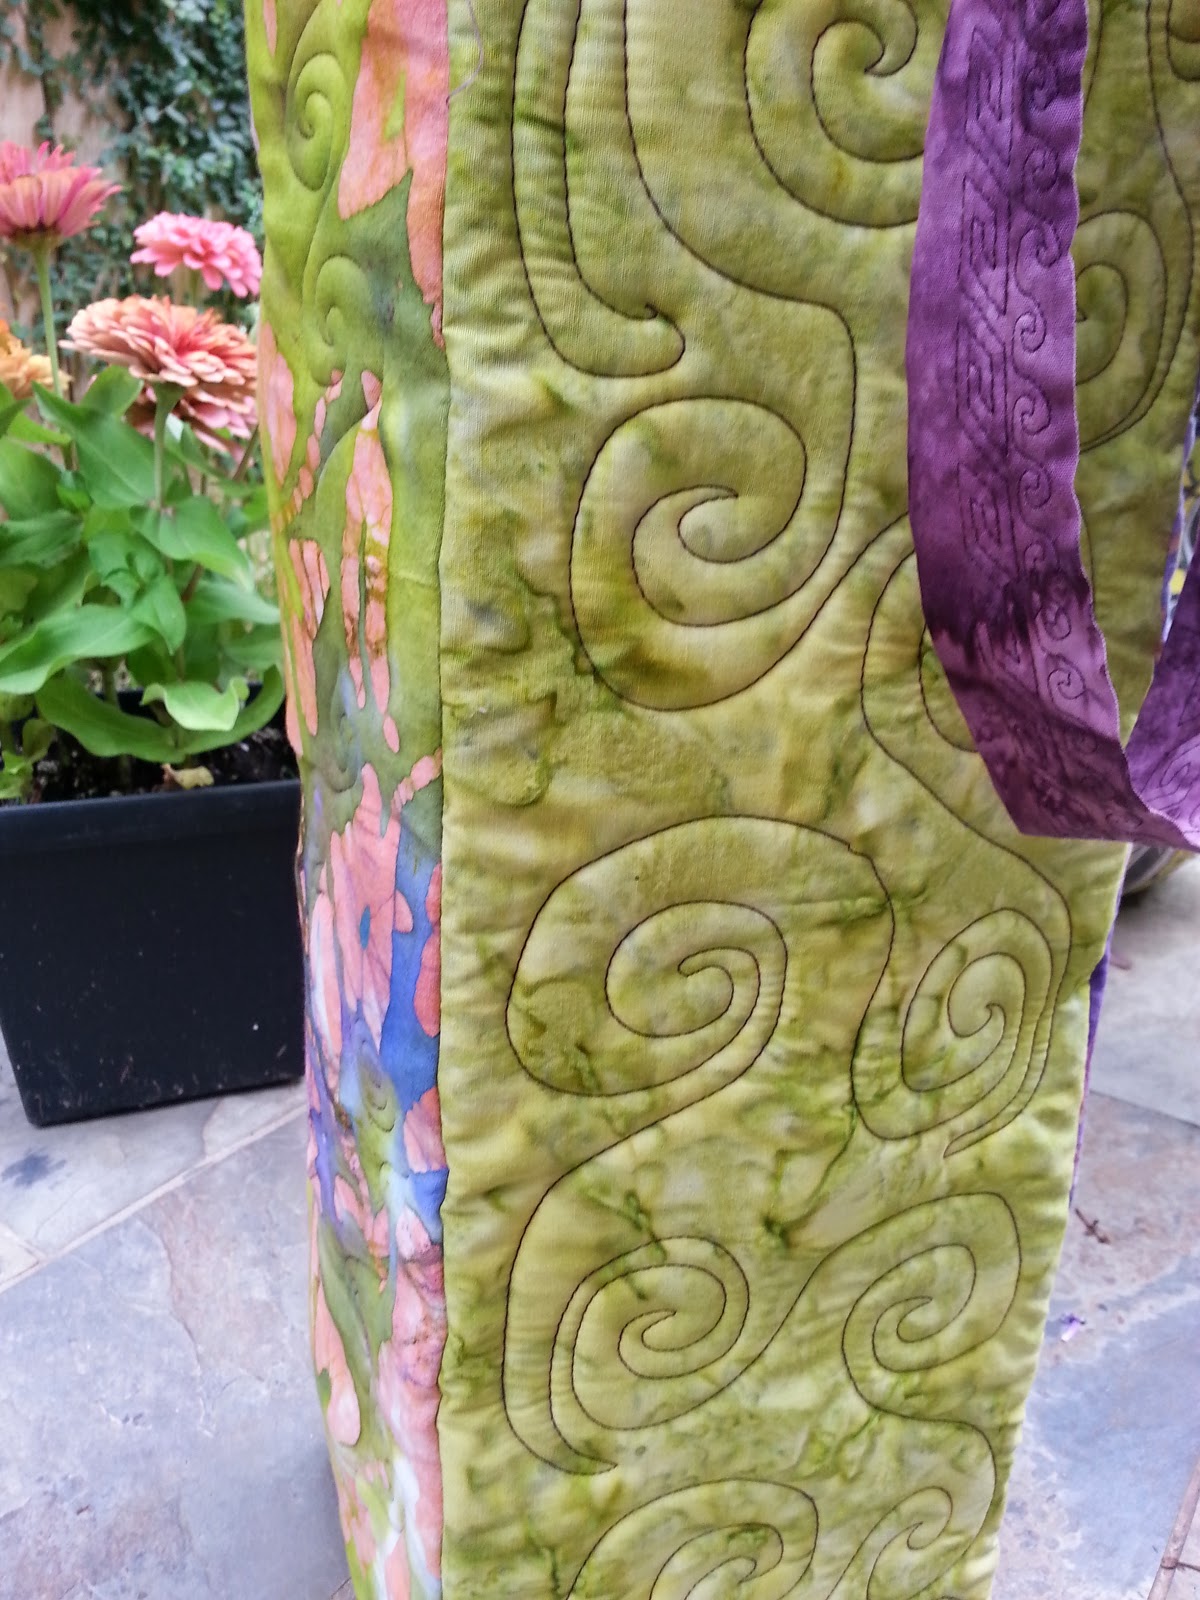
The bag is fully lined... its 24 inches tall, 6 inches wide - just big enough to toss in a rolled yoga mat, a small towel, and a water bottle!

This is very simple to make. But in case anyone is interested in a tutorial... Here's how I made it.
Cut 8 panels - 7 in x 25 in
- 4 panels for the outside, 4 for the lining

Note: fat quarters work great, but they aren't quite tall enough, so I added a 3 inch border around the top. This also gives it a nice finished look.
Cut 2 pieces, 7 in square for the bottom panel
Cut a strip for the strap to desired length.
Cut batting or stabilizer: 4 panels 6 in x 24 in, 1 panel for bottom - 6 in square
(Again, I used Soft and Stable product from By Annie. It's truly great stuff for these projects!)
Sewing:
Place the fabric panels on the top and bottom of batting/stabilizer, be sure to place the right sides on outside
Free motion quilt the 4 side panels, or machine embroidery, or secure using straight stitch
Sew a large X pattern on the bottom panel
Finish the strap as desired
Place strap on center of two opposite panels. Secure.
To finish the top: Fold the remaining fabric of top panel over top of batting/stabilizer. Fold extra lining fabric to line up with top. Secure temporarily with binding clips.
Line up the quilted pieces with the right sides together, sew along the fabric edge.
(These can be assembled using using the overlock stitch or zig zag.)
Sew all the edges together with bag inside out. Make sure you are catching all four layers.
Turn bag right side out.
Top stitch around the top edge to secure top and give it a nice finished edge.
Step back and enjoy your new quilted yoga mat tote bag. Take your breath of choice!
Linking up with Freshly Pieced WIP Wednesday.
For projects like this, I always use Soft and Stable (from - By Annie) for the batting. It gives it a nice shape... and keeps it from flopping over. With the Soft and Stable, this bag will stand on its own, which will make it easy to slip the mat in and out. Soft and Stable is fairly easy to sew through - just be prepared to toss your needle after a couple hours of sewing.
The bag is fully lined... its 24 inches tall, 6 inches wide - just big enough to toss in a rolled yoga mat, a small towel, and a water bottle!
This is very simple to make. But in case anyone is interested in a tutorial... Here's how I made it.
Cut 8 panels - 7 in x 25 in
- 4 panels for the outside, 4 for the lining
Note: fat quarters work great, but they aren't quite tall enough, so I added a 3 inch border around the top. This also gives it a nice finished look.
Cut 2 pieces, 7 in square for the bottom panel
Cut a strip for the strap to desired length.
Cut batting or stabilizer: 4 panels 6 in x 24 in, 1 panel for bottom - 6 in square
(Again, I used Soft and Stable product from By Annie. It's truly great stuff for these projects!)
Sewing:
Place the fabric panels on the top and bottom of batting/stabilizer, be sure to place the right sides on outside
Free motion quilt the 4 side panels, or machine embroidery, or secure using straight stitch
Sew a large X pattern on the bottom panel
Finish the strap as desired
Place strap on center of two opposite panels. Secure.
To finish the top: Fold the remaining fabric of top panel over top of batting/stabilizer. Fold extra lining fabric to line up with top. Secure temporarily with binding clips.
Line up the quilted pieces with the right sides together, sew along the fabric edge.
(These can be assembled using using the overlock stitch or zig zag.)
Sew all the edges together with bag inside out. Make sure you are catching all four layers.
Turn bag right side out.
Top stitch around the top edge to secure top and give it a nice finished edge.
Step back and enjoy your new quilted yoga mat tote bag. Take your breath of choice!
Linking up with Freshly Pieced WIP Wednesday.

Your quilted yoga mat tote bag is truly awesome, I love it! I enjoyed your beautiful blog, thanks for sharing this inspirational spot with us.
ReplyDeleteYou are so sweet. Thanks for all your kinds words! Fun to make stuff and share it. Makes the days more special. Appreciate you stopping by.
DeleteLove, love, love this yoga tote!! It is so beautiful!! You are a creative genius!
ReplyDeleteGreat job on the yoga tote! Thanks for using my Soft and Stable in the bag. It really does make your bag stand up and hold its shape beautifully! One tip on needles: I usually use a topstitch 90/14 needle when sewing with Soft and Stable and find that they last a long time. Happy stitching! Annie
ReplyDeleteHi Annie. I am so thrilled that you stopped by this little blog! Your product is amazing and it has inspired me to make so many things! I enjoy sewing and quilting ... and making the occassional tote bag is a nice diversion. Good tip on the needles choice. Thanks so much.
DeleteThis article is an appealing wealth of informative data that is interesting and well-written. I commend your hard work on this and thank you for this information. You’ve got what it takes to get attention. yoga capris
ReplyDeleteInformative Post.
ReplyDeleteolive green tote bag
thank you so much for sharing this important information with us.
ReplyDeleteWashable Door Mats
digitizing companies
ReplyDeletevisit : https://crystaldigitizing.com/
such a great job very nice post $$%$&&*
Adorable post Digitizing Website
ReplyDelete